

Step-by-Step Guide to Tying a Bow Tie
Tying a bow tie may seem like a daunting task at first, but with a bit of practice and patience, anyone can master this essential skill. Follow this step-by-step guide to achieve the perfect bow tie look every time.
Adjusting for Length
Before you begin tying your bow tie, it’s essential to ensure that it’s adjusted to the right length. Start by adjusting the neckband to fit comfortably around your neck, neither too tight nor too loose. This step lays the foundation for a well-tied bow tie and ensures a comfortable fit throughout the day.
Adjusting the Neckband
Once you’ve adjusted the length of the neckband, it’s time to secure it in place. Use the adjuster to tighten or loosen the neckband as needed, making sure it sits snugly against your neck without constricting or causing discomfort.
Ensuring Proper Length for Tying
With the neckband adjusted, check that the ends of the bow tie are of equal length. This step is crucial for achieving symmetry in your finished bow tie and ensures a polished look.
Starting with the Bow Tie
Lay the bow tie flat on a smooth surface, with one end slightly longer than the other. This asymmetry will make it easier to create the bow shape later on.
Folding the Collar Down
Before placing the bow tie around your neck, fold down the collar of your shirt to expose the neckline. This step provides better access for tying the bow tie and ensures a neat appearance.
Placing the Bow Tie Around the Neck
Drape the bow tie around your neck, with the longer end on your dominant side. Adjust the placement so that the shorter end sits slightly above the collarbone, ready for tying.
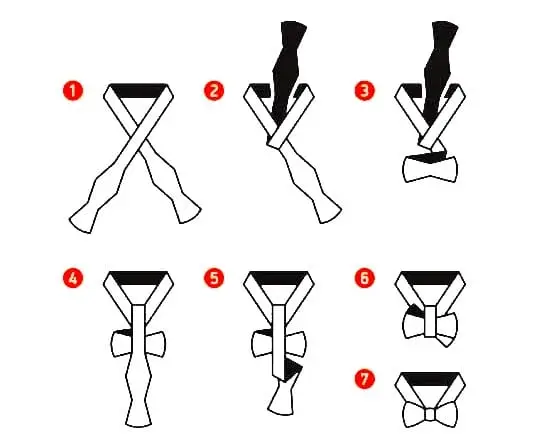
Creating the First Loop Folding One Side
Take the longer end of the bow tie and fold it into a loop, crossing it over the shorter end. This fold forms the foundation for the bow shape and sets the stage for the next steps.
Crossing One End Over the Other
Next, take the shorter end of the bow tie and cross it horizontally over the loop created by the longer end. This crossing motion creates the distinctive X shape of the bow tie.
Forming the First Loop
Pinch the crossed section of the bow tie between your thumb and forefinger to create the first loop. Ensure that it’s securely held in place but not too tight, allowing for adjustments later on.
Forming the Second Loop Creating Symmetry
With the first loop secured, focus on creating the second loop using the longer end of the bow tie. This loop should mirror the size and shape of the first loop, maintaining symmetry in the finished bow tie.
Folding the Other End
Fold the longer end of the bow ties back towards your chest, positioning it behind the first loop. This fold completes the bow shape and prepares it for the final steps of tying.
Passing Through the Loop
Thread the folded end of the bow tie through the gap between the two loops, ensuring that it passes underneath the center knot. This threading motion forms the central knot of the bow tie and secures the loops in place.
Tightening the Bow Ensuring a Snug Fit
Gently pull on both ends of the bow tie to tighten the knot and adjust the size of the loops. Be careful not to pull too tightly, as this can distort the shape of the bow tie.
Pulling the Loops to Tighten
To achieve a snug fit, carefully adjust the tension of the loops by pulling them outward. This step helps refine the shape of the bow tie and ensures that it sits neatly against your neck.
Adjusting for Symmetry
Check the size and shape of the loops to ensure symmetry on both sides of the bow tie. Make any necessary adjustments to achieve balance and uniformity in the finished look.
Adjusting the Size Making Fine Adjustments
Fine-tune the size and shape of the bow tie by gently pulling on the loops and adjusting the placement of the knot. This process may require patience and precision to achieve the desired look.
Ensuring Even Loops
Inspect the loops to ensure that they are evenly sized and aligned. Minor adjustments may be necessary to maintain consistency and balance throughout the bow tie.
Adjusting the Knot
Finally, adjust the center knot of the bow tie to ensure that it sits neatly in the center. This step adds refinement and polish to the finished look of the bow tie.
Straightening the Bow Tie Ensuring Proper Alignment
Straighten and align the loops once the bow tie is tied to ensure a clean and polished appearance. Smooth out any wrinkles or folds for a crisp finish.
Adjusting the Center Knot
Verify that the center knot of the bow tie is centered and secure, with both ends lying flat against your chest. This adjustment enhances the symmetry and balance of the bow tie.
Fluffing the Loops
Gently fluff the loops of the bow tie to add volume and dimension. This subtle detail enhances the visual appeal of the bow tie and contributes to its refined look.
Securing the Bow Tie and Fastening the Neckband
Once the bow tie is tied to your satisfaction, fasten the neckband securely around your neck. Ensure that it sits comfortably without constricting or shifting throughout the day.
Ensuring Proper Fit
Double-check the fit of the bow tie and neckband to ensure comfort and stability. Make adjustments to achieve the ideal balance between snugness and ease of movement.
Concealing the Band
Tuck the excess length of the neckband under the collar of your shirt to conceal it from view. This small adjustment adds a polished finish to the overall appearance of the bow tie.
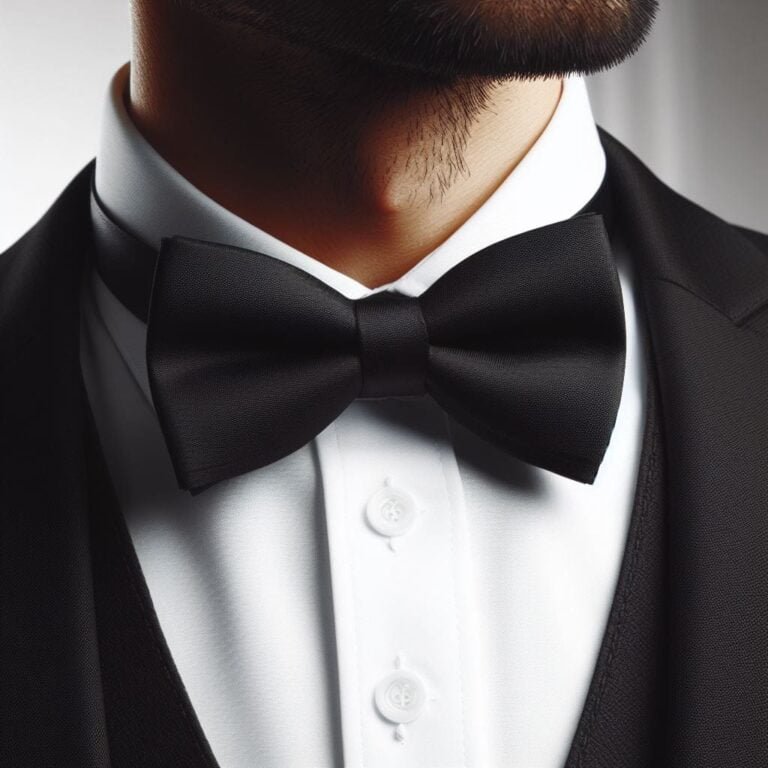
Mastering the art of tying a bow tie may take time and practice, but the effort is well worth it for the timeless elegance it adds to any ensemble. With this comprehensive guide, you’ll be able to tie a perfect bow tie every time and embrace the sophisticated style that comes with it. Whether for formal events or everyday wear, a well-tied bow tie will make a statement and elevate your look with its classic charm and refinement.